Siding Repair

The Basics of Siding Installation

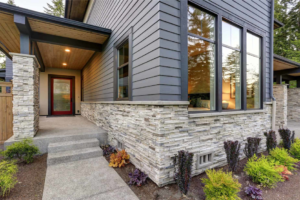
Siding Installation Murfreesboro TN involves applying a material to the exterior of your house. It protects it from various environmental elements, and enhances its appearance.

Siding

Start by estimating the square footage of each exterior wall. This will give you a rough estimate of the cost of the siding.

Prepare your home for the project. Inside, clear off any shelves that could fall, and move furniture away from the area. Outside, trim your lawn so crews can work more easily.

The cost of siding installation depends on a number of factors, including the type of material used and the size of the home. It also includes any applicable taxes and fees. The cost of a new roof and windows must also be considered, as these will increase the overall project cost. The best way to get an accurate estimate of the cost is to ask several contractors for quotes.

To determine the amount of material needed, first calculate the total square footage of your exterior walls. Then subtract the size of any windows and doors to find the remaining area. Then divide this figure by 100 to get the square footage of siding material required. This will help you create a budget for the project.

You should keep in mind that the cost of siding may fluctuate depending on the season. Labor and materials tend to be more expensive during summer and early fall, when demand is high. In addition, different types of materials require varying amounts of maintenance and upkeep. For example, vinyl requires little maintenance beyond periodic cleaning, while wood siding needs regular painting or staining to maintain its appearance and protective qualities.

Another factor to consider is the energy efficiency of your home. Some siding is more efficient than others, reducing your energy consumption and helping you save on utility costs. Additionally, certain types of siding may qualify for tax credits, which can reduce your taxable income.

Before installing siding, you should consider your financing options. Some lenders offer loans specifically for siding projects. You can also open a home equity line of credit (HELOC) or borrow against your existing mortgage. If you decide to take out a loan, you should shop around for the best rates. Many contractors offer financing options as well, so be sure to ask about them.

Finally, you should be aware that your homeowners insurance will probably not cover the cost of siding installation. Be sure to discuss this with your insurer before beginning the project. In addition, it is a good idea to remove all vehicles from the driveway during the installation process. This will help prevent damage to your vehicles and reduce the risk of an accident.

Materials

When it comes to choosing the materials for your siding installation, there are many different options to consider. Some of the most important include moisture resistance, wind resistance and the ability to resist sun exposure. You will also want to consider the color, texture and finish of the material. Depending on your project, you may also need to buy accessories such as trim, starter strips, J-channels, corner posts, and drip caps.

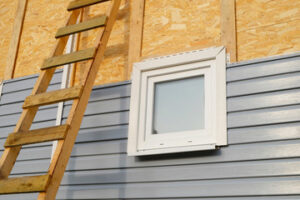
When starting your project, you will need to lay down a base layer of sheathing. This will typically be made from oriented-strand board, or OSB. It is similar to plywood, but it is more durable and water-resistant. You will then install a weather barrier, which is a sheet of breathable and waterproof material that will protect the OSB and sheathing from the elements.

Once the base is in place, you will start putting down the siding panels. It is best to start from the bottom of the wall and work upwards. This will help to ensure that the siding is installed in a level fashion and is correctly aligned. You should always apply a little bit of pressure as you nail each panel to the sheathing. This will help prevent over-tightening, which can damage the sheathing and lead to leaks in your home.

As you continue to layer the siding, you will need to cut it to fit around windows and doors. You should leave about a quarter of an inch on either side of the window to allow for natural expansion and contraction. You should also leave a 1/4″clearance above any surface where water may collect, such as steps, porches, and roofs.

Before installing the siding, you will need to nail a strip of furring along the bottoms of all sheathing boards to provide a foundation for the trim and siding. This will prevent moisture from entering the wall cavity and damaging the sheathing or framing. If you are building a house with a box soffit return or a hip roof, you will need to nail an inner band of J-channel under the soffit edge.

Installation

Siding is a great way to increase your home’s resale value and protect it from weather damage and wear. When the siding is in good condition, you’ll also spend less time on maintenance and repair. It’s important to find a contractor with experience in siding installation so that you can be sure the work will be done correctly. A reputable and licensed siding company will have the proper insurance and licensing to provide you with peace of mind throughout the project.

Before the siding is installed, the crew should remove any old caulking and paint to prepare the wall for the new material. This will give the new siding a better surface to adhere to, and it will help prevent moisture from damaging the house. In addition, a waterproof barrier should be applied to the foundation and walls, and flashing should be installed around all doors, windows, and vents to keep water out of the walls.

Once the preparation is complete, the installer will begin installing the new siding panels. They will start at the back of the house, working towards the front, and leave about a quarter inch of space between each panel to create a weather-resistant seal. They will also install a soffit and fascia, which can help to prevent mold and insects. It’s important to make sure that the siding is properly secured so that it won’t shift or buckle, and the fasteners are affixed tightly.

Depending on the type of siding you choose, the installation process can take anywhere from one to several days. It’s important to check with your local government about the required permits and inspections. In some cases, the contractor may be required to provide a permit, especially if it’s a large home improvement project. This will protect homeowners from being fined for improper installation or working without a permit.

It’s also important to make sure that you have enough room for the installation team to move around your house. This is necessary so that the crew can access the areas they need to install the siding and trim. This includes a parking area, where they can park their tools and trucks. You should also remove any items or furniture that could get in the way of the crew’s work, and trim any bushes or shrubbery so they won’t get damaged during the project.

Maintenance

Siding isn’t just a protective exterior for your home; it also provides added insulation, lowering your energy bills. Regular maintenance, inspections and repairs keep your siding looking great and functioning well. When left unattended, your siding can deteriorate and lead to problems like pests, moisture, mold and structural damage. It is important to choose the right type of siding for your area, lifestyle and aesthetic preferences. Siding is available in a variety of colors, finishes and materials. The material you choose should be durable, affordable and complement your architectural style.

Before the siding is installed, your contractor should inspect the walls for any issues that need to be addressed before beginning work. This may include sheathing damage, water rot or the presence of asbestos. These issues should be repaired before proceeding with the project, as new siding will not be securely attached if the sheathing is damaged.

Once any necessary repairs have been completed, the OSB and weather barrier can be installed. Then, the siding panels are placed one by one and nailed in place using hot-dipped galvanized coil nails or 16 gauge finish nails that are resistant to rust. The siding panels are then overlapped, creating a tight seal to prevent water and air infiltration.

After the installation of your siding, a specialized crew will come in and caulk and paint your walls. They will powerwash the walls to clean off any dust and dirt, then swatch your color selection on the wall before they begin painting. Once they are done, the Sherwin Williams Duration topcoat will be applied to your entire house, providing a beautiful, long-lasting finish.

To avoid any surprises during the siding installation process, it is a good idea to buy 10%-20% more material than you need. This will allow you to have a few pieces on hand for future repairs or replacements. Additionally, buying your materials through a professional will save you money because contractors get discounts on materials directly from the manufacturers. If you are planning to hire a contractor for the job, make sure that they are licensed and vetted to pull permits on your behalf. Not doing so could result in hefty fines down the line.

Masonry

Masonry As a Building Technique

Charleston Masonry is a building construction technique using brick, concrete blocks, and structural clay tile held together with mortar. It can be weight-bearing and used to hold up a roof or purely decorative, as in the case of the ornate Gothic cathedral’s flying buttresses.

Masonry

Many advances in materials and technology are pushing the boundaries of masonry’s capabilities. Architects can use these advances to enhance durability and energy efficiency while minimizing the impact of construction on the environment.

Foundation work may be the down-and-dirty side of homebuilding, but it’s vital to ensuring the safety and durability of a structure. This comprehensive guide explains how to construct foundations using masonry, including details on footings and foundation walls, as well as concrete slabs. In addition, pro builders share their tips on how to waterproof a foundation to prevent basement leaks and odors, and how to use brick to build patios, walkways, firepits, and stone walls in the yard.

Masonry foundations offer robust support and timeless appeal for residential structures. However, they can require periodic inspections and repairs to address cracking and other issues.

Choosing the right masonry foundation type is essential to building a strong and stable home. The type of foundation selected will depend on factors such as the soil type and the presence or absence of bedrock.

Poured concrete and masonry block foundations are both highly durable, but each offers unique benefits in different areas. Concrete offers greater resistance to damage from hydrostatic pressure, while masonry has better load-bearing capabilities.

Concrete and masonry foundations must be designed to support both the dead loads of the structure above and the imposed loads transferred from the foundation to the surrounding soil. This transfer is critical to preventing differential settlement, which can affect the stability of the entire structure.

Masonry foundations are typically designed to withstand shear stress caused by wind, earthquakes, or backfill forces that push against the walls. Shear stress is a combination of axial force and bending moment, which can be reduced by increasing wall thickness or masonry compressive strength.

A masonry strip foundation is ideal for small structures in good soil. This type of foundation is considerably wide at the base and gradually narrows upward, which distributes imposed loads evenly over a large area and improves stability.

A masonry spread or isolated footing is another popular choice for residential buildings. These footings are positioned beneath load-bearing walls and typically have a wider bottom than the top portion. This design is ideal for transferring imposed loads from the foundation to the surrounding soil and improving stability.

Walls

Masonry walls serve a variety of purposes, from providing support and structure to defining an area for safety and shelter. They can be load-bearing or non-load-bearing and come in various shapes and sizes. Load-bearing masonry walls carry the weight of a building’s roof and floors and transfer them down to the foundation. These walls are crucial for a building’s structural integrity. It is important to properly assess whether a wall is load bearing or not before beginning construction. A professional contractor or structural engineer can help determine this.

Brick is a popular material for load-bearing walls in residential construction. Masonry blocks can also be used for load-bearing walls in commercial construction and retaining walls. Concrete masonry is an excellent choice for foundations and basements because it’s resistant to termites and provides insulation. In addition to its durability, masonry is long-lasting and easy to maintain. It is also energy-efficient. Brick and stone walls provide natural insulation that helps regulate indoor temperatures, which can reduce energy costs.

Non-load-bearing masonry walls are typically constructed from block materials, which are easier to lay than bricks. They can be faced with brick masonry or concrete, or they can stand alone as walls for factories, garages, and other buildings where appearance isn’t important. In modern construction, block walls are often covered with veneered brick masonry for aesthetic appeal.

Framing walls in a home are typically constructed using studs and OSB sheathing. Sheathing is nailed to the studs, creating an effective structure that resists lateral forces. The sheathing is then covered with drywall to give the walls rigidity. It is important to use the right materials for sheathing and drywall, as these components can affect the strength of the wall.

Internal masonry walls are sometimes framed with timber or metal frame. It is essential to ensure that a new internal masonry wall is supported adequately, especially if it is load-bearing. A professional contractor or structural engineer can determine if a wall is required to bear the weight of a structure, and if so, how much weight it is expected to support.

Roofs

Masonry can be used for a variety of roofing systems. It can also be built as a structural component or incorporated into a design feature. The ancient Roman architect and engineer Vitruvius coined a phrase for the ideal material or form: Firmitas (strength), Utilitas (usefulness) and Venustas (beauty). The three attributes are interconnected and can be applied to the construction of masonry buildings, from foundations to decorative veneers.

Brick masonry is one of the most popular methods of construction, offering homeowners a durable and attractive material for their home. Bricks are typically stacked together and held in place with mortar to create walls, which can be load-bearing or non-load-bearing. Load-bearing walls are ideal for supporting roofs and floors, while non-load-bearing walls serve primarily as partitions or decorative elements.

Masonry is resistant to break-ins, fires and severe weather conditions, helping to keep insurance rates lower than other types of structures. Brick or stone masonry structures are also easier to maintain and don’t require constant painting or staining, saving you money in maintenance costs. Brick and stone also offer superior insulation, keeping indoors warmer in the winter and cooler in summer while regulating humidity levels.

Masonry is also suitable for walkways, adding aesthetic and functionality to landscaped areas. Brick or stone walkways are a common choice, resting on a crushed rock base to provide drainage and allow for slight movement with temperature changes. Regular inspections can help extend the lifespan of masonry structures, preventing minor issues from becoming major repairs.

Decorative elements

Masonry materials like brick, stone, and concrete provide structural support, but they can also be visually stunning. The versatility of these materials lets architects and builders incorporate masonry into virtually every aspect of the building design. Whether it’s an eye-catching backsplash in the kitchen or a stunning courtyard, masonry can add depth and character to a home.

The solid, stable surfaces provided by masonry allow wall painting techniques like fresco and trompe-l’oeil to thrive. The combination of a unique color palette and the illusionistic effects created by these arts create visual interest and depth. Masonry can even serve as a backdrop to a living wall of greenery, adding natural beauty and texture to a home.

When it comes to brick, a variety of bond patterns and brick detailing can create distinct visual accents. A raking bond focuses on horizontal emphasis, while a herringbone pattern creates a distinctive zigzag effect. Other decorative masonry details include quoins, which adorn the corners of buildings and act as ornamental accents. Quoins can be made from different types of masonry like stone, precast blocks, or terracotta, and can feature a variety of different textured surface finishes.

Modernism sought to break from traditional architectural styles, but masonry has continued to play an important role in the development of contemporary architecture. Frank Lloyd Wright’s Fallingwater, for example, showcases the power of masonry construction by combining stone walls with an innovative structure.

While the most common uses of masonry are for foundations and walls, it can also be used for doors, arches, and other decorative elements. Masonry can be combined with other materials like glass to enhance the look of an entranceway or create a unique walkway. Masonry can also be incorporated into the landscaping of a home to add privacy or to create focal points in gardens.

Incorporating masonry into the home is an excellent way to express a homeowner’s personal style and make the space feel more welcoming and inviting. Brick and stone offer a variety of color options, from earth tones to bold hues. Masonry products can be tinted, frosted, or textured to give them a unique look and complement a home’s architecture.

Home Improvement

Types and Styles of Siding

Siding not only defines a home’s overall look, but also serves to protect the structure from harsh sun and heat, torrential rain and heavy snow. It also offers a variety of insulation options to help reduce energy costs.

Various siding materials include board and batton, clapboard, fascia, furring strips and more. Some offer additional benefits like rot and termite resistance. Contact Charleston Siding Pros now!

Wood siding has long been a popular option for homeowners. With an array of different types and styles to choose from, this material allows you to add a rustic or elegant look to your home’s exterior, while also providing superior insulation. However, the type of wood you choose will greatly impact your siding’s performance. Cedarwood is an excellent choice, as it naturally resists rot and is unattractive to termites. It’s also a durable material that won’t warp or crack as easily as other types of wood, and it can last 30 years or more with regular maintenance.

Ash is another great option, as it is dense and resistant to rotting and insect infestation. It’s also a good choice for types of siding that require milling, like tongue-and-groove, and it can be stained or painted to match your aesthetic. Fir is another popular option for wood house siding, as it’s easy to cut and has little sap or resin that can clog saw blades. It’s a good choice for cabin-style homes, as well as drop channel siding, which offers a sleek, streamlined appearance and provides extra insulating value.

Garapa is a growing favorite amongst homeowners due to its durability and resistance to water damage, while also being highly insect-resistant. It’s an excellent choice for warmer climates, as its light color pigments help reflect sunlight and keep the home cool. Garapa is also relatively easy to work with and requires minimal maintenance. Some manufacturers offer a wood treatment called shou sugi ban, which is the traditional Japanese process of charring timber to make it more durable and give it a striking burnt texture and black color.

Vinyl

Vinyl siding, made from polyvinyl chloride (PVC), is an affordable choice that looks much like painted clapboard or shingle siding. It’s lightweight, fade-resistant, and offers a wide range of colors and textures. However, it’s important to understand that it can look rundown if not maintained properly.

Vinyl has become the go-to for many homeowners due to its low initial costs and relatively simple maintenance requirements. It’s a durable and long-lasting product that can stand up to heavy winds, hail, and excessive moisture. However, vinyl can still be susceptible to damage if it’s not installed properly or the wrong product is used.

Typically, the first step in installing vinyl is to apply a water-resistive barrier. This stops incidental water from penetrating the house and causing damage. In addition, code-compliant flashing must be installed to prevent water infiltration around windows and doors.

The next step is to determine the lowest point of the wall that needs sided. It’s important to make sure the surface is flat and level for proper installation. It’s also recommended to install a vapor barrier underneath the vinyl, and a thermal break around the house’s foundation to reduce air infiltration.

When fastening vinyl, it’s important to use ‘loose’ nails to allow for expansion and contraction with varying weather conditions. Over tightening can cause the vinyl to pull away from the house and leave gaps that allow water to infiltrate and create other problems, such as mold, mildew, or rot.

It’s a good idea to buy extra vinyl material to allow for waste during the installation process and for future repairs. It’s also a good idea to consult a professional prior to selecting the perfect style for your home. This professional will be able to help you find the best color to match your neighborhood and your personal style.

Aluminum

Aluminum siding is a popular option for homeowners who are looking to clad their homes in a durable and attractive material. This is because aluminum is a tough, lightweight material that can resist damage caused by harsh weather conditions. It is also easy to install, making it a cost-effective alternative to other types of siding.

Unlike steel, aluminum doesn’t rust, so you don’t have to worry about it being damaged by rain or high humidity. And unlike vinyl, aluminum can withstand strong winds without the panels being ripped off the home. Aluminum is available with a smooth or natural-looking wood grain finish, so it can provide a modern or traditional aesthetic for the home. In addition, it’s easier to maintain than other materials, such as vinyl. This is because aluminum doesn’t have to be painted as often as other siding options, since the color goes all the way through the material.

One drawback of aluminum is that it can crack, dent and scratch, which can be a problem for some homeowners. However, this can be corrected by installing a thicker gauge of the material. Thicker siding is more resistant to damage and provides better insulating properties that can save money on energy costs in the long run.

Another benefit of aluminum siding is that it’s a sustainable and environmentally-friendly material. It can be recycled again and again, unlike vinyl, which is only good for a single cycle of recycling before it ends up in landfills, where it pollutes the environment with harmful chemicals. It is also fire-resistant, which is a huge advantage in areas with wildfire risks. However, it is important to note that while aluminum does have many benefits, it is not maintenance-free. It still needs to be repainted periodically, just like other siding materials do.

Steel

Steel siding is traditionally found on commercial buildings, but it has become a popular alternative for homeowners who prioritize durability and aesthetics. It can withstand severe weather conditions and pests, as well as offer resistance to fire. It is also an excellent choice for builders who are looking to maximize energy efficiency. Steel siding is available in a variety of styles, including panels that resemble logs for a rustic cabin look. It can be painted to match any color or design, and may come with a wood-like texture that provides more contrast with light and shadow than standard vinyl or wood siding options.

Steel panels do not deteriorate as easily as other types of siding, which helps minimize maintenance requirements and saves money in the long run. Homeowners can typically expect to get 50 years out of steel siding before it needs panel replacement, whereas wood or vinyl may last between 40-60 years. Steel is a more durable option than aluminum, and manufacturers may provide a warranty that covers issues like cracking, chipping, peeling, chalking, and fading. Quality Edge, for example, offers a lifetime warranty on its TruCedar steel siding products.

In addition to the longevity and durability of steel siding, it is highly recyclable, which can help reduce environmental impact. It is also easy to maintain, with mild soap and water usually sufficient to keep it looking new. Because it is more durable than other types of siding, steel can withstand heavy impacts from hail or flying debris, making it an excellent choice for homes in areas prone to harsh weather conditions.

Composites

Composite siding is a newer alternative to vinyl and wood. It’s engineered to withstand harsh weather conditions, resist pests and rot, and maintain its appearance with minimal maintenance.

Like wood, it is available in a wide variety of colors and styles. It is also easy to paint, allowing homeowners to refresh the look of their home with little hassle.

In addition to being water resistant, composites can withstand high temperatures and are often fire-rated. This feature is particularly beneficial for those in areas prone to wildfires.

Composites are also designed to resist rot, mold, mildew, and other environmental factors that can damage traditional siding materials. They’re typically built with reinforced cores, and many manufacturers use advanced technology to create a durable surface that’s resistant to impact and abrasions.

Unlike traditional wood, which can attract termites and other pests, composites are often infused with anti-termite additives. Additionally, some manufacturers utilize a protective coating to prevent damage from insects and moisture.

Many homeowners choose to install composites because they are long-lasting and can withstand harsh weather conditions. This durability means fewer repairs and replacements, saving homeowners money in the long run.

One of the biggest benefits of composites is that they’re more eco-friendly than vinyl and wood alternatives. Manufacturers use recycled materials and efficient production processes to minimize energy consumption and reduce waste. In addition, most are devoted to sustainability and use yearly audits to ensure compliance with environmental regulations.

Home Services

Different Methods of Drain Cleaning

Drain Cleaning Perth is vital to maintaining a functional plumbing system and promoting a hygienic living environment. Foul odors and clogged drains are signs of a problem with your sewer line.

If a clogged drain persists, various methods can be used to remove it. Some of these include:

Acid-based drain cleaners use potent acids like sulfuric and hydrochloric to dissolve stubborn blockages. They are often effective against organic debris such as food, hair, and soap scum. They can also tackle inorganic buildups like minerals, rust, and scale. These highly corrosive chemicals should be handled with extreme caution and only by professionals. They are typically sold in liquid, gel, or crystal form and come with instructions on how to use them safely. Using proper safety equipment like gloves, a face mask, and goggles can help to protect users from splashes and fumes. It is also important to avoid mixing different drain cleaners as they can react violently and produce toxic gasses.

Caustic drain cleaners use substances like lye and caustic potash to break down materials that cause clogs. These alkaline compounds release heat and turn grease into a sludge that can be washed away. They are typically heavier than water and can move through standing water to reach a clog. Oxidizing drain cleaners use chemicals like household bleaches and peroxides to oxidize organic material in the clog, turning it into smaller particles that can be washed away. They may be slower than acid and caustic drain cleaners, but they are effective against most types of clogs.

Chemical drain cleaners are dangerous if they come into contact with skin or eyes, and can also be toxic if ingested. They are also damaging to the environment when they seep into soil and groundwater, contaminating water sources and causing harm to plants and animals.

They can also corrode metal pipes, leading to leaks or bursts. Regularly cleaning drains with non-corrosive chemicals can reduce the need for these dangerous products. Many home owners choose to make their own drain cleaner by pouring boiling hot water followed by a mixture of baking soda and distilled white vinegar down the drain. This can help to break down organic debris, such as food scraps and hair, and prevent future clogs. While this method is less harmful than chemical drain cleaners, it should only be used as a last resort.

Mechanical drain snakes

Drain snakes – also known as plumber’s augers or pipe cleaners – use a mechanical, rather than chemical, approach to dislodge stubborn drain blockages. This makes them a preferred option for environmentally conscious homeowners and for pipes that may not withstand the harsh chemicals used in chemical drain cleaners. Essentially, plumbing snakes consist of long, flexible metal cable with an auger head at the end that can hook, grab, or break up and retrieve whatever is causing the clog.

They can be purchased in a range of sizes and lengths to reach obstructions at different depths throughout the drain pipes. However, it is important to choose the right size for your pipe, as using one that is too small can cause the snake to get stuck or damage the pipes. You can find the right size by referring to the manufacturer’s instructions or consulting with a professional.

It is also important to use proper snaking techniques when using a drain snake, as improper handling can lead to physical injuries such as bruises and cuts. There is also the risk of causing further blockage by pushing the clog further down the pipe. Moreover, coming into contact with the waste material can be a health hazard as it can spread bacteria and viruses.

To avoid these issues, it is best to have a professional drain cleaning company handle the job. They will know which drain snakes are appropriate for different pipe sizes and types of clogs, and they will also be familiar with complementary methods for cleaning drains. In addition, a professional will be able to ensure that the clog is completely removed and won’t recur.

A sluggish sink or bathtub can often indicate that your drain pipes are blocked with grease or other material buildup. Fortunately, drain snaking is an efficient and effective method for eliminating these obstructions. The only downside to this approach is that it can be messy, so it’s important to take steps to minimize the mess and clean up afterward.

The following tips will help you safely and effectively use a drain snake to unclog your home’s toilets, showers, and sinks. These helpful tips include the mechanics of how a drain snake works, when to use it, step-by-step instructions for safe and successful operation, common mistakes to avoid, and complementary methods for tackling stubborn blockages.

Hydro-jetting

Hydro jetting is one of the safest and most effective methods of clearing clogged drain and sewer lines. It eliminates a wide variety of debris that accumulates in pipes over time, including grease, soap scum, dirt and mineral deposits. It also cleans more thoroughly than snakes or augers and is safer for older or fragile pipes. Hydro jetting uses powerful water streams that dislodge clogs and ensure a fully functional pipe system.

Unlike mechanical drain cleaners, hydro jetting does not require any chemical additives or solvents and is non-toxic to human beings. It also doesn’t damage pipe walls, and it keeps pipes clean four times longer than other drain cleaning techniques. In addition, it can reach clogs in buried pipes that are otherwise inaccessible. However, it can be a dangerous procedure in the hands of an inexperienced plumber and should only be performed by certified professionals.

It is also a more expensive option than mechanical drain cleaners, but it can save money in the long run by preventing costly repairs and sewer backups. It is also a good choice for businesses that regularly experience clogged lines. Restaurants, in particular, have trouble with recurring grease buildup, which is the cause of half of all sewer overflows in the United States. While snaking can remove some of the buildup, hydro jetting is the most effective way to flush a system completely and prevent future blockages.

Before using a hydro jet, a plumber will first insert a camera into the line and locate the source of the problem. This allows them to determine the severity of the clog and what type of treatment it requires. Once they have found the clog, they can attach a special nozzle to the hose and use the high-pressure water stream to blast away debris.

The process can be used in homes as well as commercial establishments. The nozzles are designed with different holes that allow them to target a specific area in the pipe wall and blast away stubborn debris. The nozzles can also be adjusted to provide different water pressures and temperatures, making the process more effective in different situations.

Enzyme cleaners

Enzyme cleaners use biological compounds to break down organic residues and stains in drains, sinks, and toilets. These biodegradable products contain special bacteria that produce enzymes to break down complex organic molecules into simpler substances that can be washed away with water. These bio-based cleaners are a safer, more eco-conscious alternative to chemical drain cleansers.

The natural microorganisms in enzyme-based cleaners can also help maintain a healthy plumbing system by breaking down grease, grime, soap scum, and other organic matter that may clog pipes. Regular use of these products can keep drains and traps clear and prevent odors from building up in kitchens, bathrooms, and laundry rooms.

Because they are non-toxic and biodegradable, bacterial enzyme cleaners are ideal for commercial and residential properties. They are especially useful for restrooms, where odors and stains can build up quickly. They are also highly effective for cleaning pet urine, food spills, and blood stains from clothing and fabrics.

While bleach and other disinfectants can typically take care of organic stains in bathroom linens, upholstery, and carpets, enzyme cleaners are more effective for tackling the smelly, fecal-based messes that are sometimes left behind by pets. They are also a great choice for sanitizing equipment like scrubber/extractor recovery tanks, mop buckets, and cleaning tools, which can develop a variety of odors over time.

Bio-enzyme products are also an excellent choice for maintaining drains and traps in multi-story buildings. A bio-enzyme product with a high bacterial count (ideally, at least 5.4×10⁷ ufc/mL) can keep grease and oil from accumulating in drains and traps, preventing blockages and odors.

In addition, a bio-enzyme product can be sprayed into trash chutes to prevent foul odors from forming in trash compactors and dumpsters. These products are often used in high rise apartments and condos to mitigate odors from the smelly trash chutes that serve multiple floors of residents. A bio-enzyme product formulated with amylase and lipase can be particularly effective for breaking down starches and fats. As an added bonus, these products are safe to use on all drain lines, including PVC, polyvinyl chloride (PVC), ABS, and concrete pipe.

Pest Control

The First Steps in Pest Control

Accurate pest identification is an important first step in a successful pest control program. Understanding the life cycle and environmental conditions favoring pests will help you develop effective management strategies.

Natural controls (e.g., weather, topography) limit pest populations by restricting their food sources or habitats. Biological control uses predators, parasites, or pathogens to injure or kill pests. Contact Springfield MO Pest Control now!

The first step in controlling a pest is to identify it. Incorrect identification can lead to a knee-jerk reaction to spray the invader with insecticide or other chemicals that may harm people and pets or destroy the environment.

To identify a pest, look at the invader closely and note its characteristics. For example, count how many legs it has, whether it has wings or antennae, and what color it is. Also, note any other distinguishing marks or behavior. Insects and other invertebrates often change appearance during different stages of life, so it is important to observe the pest at various times of the year and in varying conditions.

Using an online pest guide is another good way to identify the pest and learn about its habits, habitats, threats, signs of an infestation, and prevention and control methods. The guides typically include photos of the pest and a description of its size, shape, and color. They also provide information about the pest’s behavior and where it is found in the environment, such as food sources, breeding sites, and natural enemies.

Once you have identified the pest, you need to determine how much of a problem it poses and what steps are necessary for pest control. Consider factors such as the pest’s impact on the environment, how many of its eggs or young it lays per day, how long it lives, and whether its presence is acceptable.

If the population of a pest is causing unacceptable harm, it may be necessary to control it by suppressing its numbers. This can be done through a variety of means, including sealing cracks and crevices, cleaning up garbage cans, and removing or closing off hiding places. The use of monitoring to assess the effectiveness of suppression and other control methods is a key part of an IPM approach to pest management. Correctly identifying the pests can help you select the most effective management strategies and choose the best time to apply them. Keeping track of the pests you’re controlling can also save you money and effort by helping you avoid repeated treatments that aren’t effective.

Pesticides

Pesticides are chemicals that kill, suppress or repel pests. They are used to protect crops, food, ornamentals and livestock. They are found in spray cans and crop dusters, garden hoses and hand soaps. They can also be found in antimicrobials (disinfectants), herbicides, fungicides and rodenticides. They can damage the environment, contaminate water and harm human health. They may reduce invertebrate biodiversity in streams,[71] destroy pollinator populations and endanger endangered species. They can also disrupt the natural balance of plants by killing beneficial insects and reducing their food supply. They can be absorbed by the skin and inhaled, causing respiratory problems. They can also contaminate soil, groundwater and surface water.

When using pesticides, carefully read the label and follow all safety instructions. Keep them out of reach of children and pets. Wear the protective clothing suggested on the label, including rubber gloves. Avoid spraying on windy days. Dispose of empty containers in a safe place and away from fish, wildlife and native plants.

Select a pesticide designed for the specific pest you are trying to control. It should have a picture of the pest on the label. Insecticides are the most acutely toxic. Fungicides are generally less toxic but have chronic risks such as causing cancer and Parkinson’s disease. Herbicides are more benign but can interfere with plant growth or cause environmental problems.

Time pesticide applications according to the life stage of the pest. The most susceptible stages are the egg, larva and nymph. Adults are usually the least resistant to insecticides and miticides.

Integrated pest management, which uses natural enemies to control pests, can be an effective alternative to chemical controls. However, there is a time lag between the increase in natural enemies and the resulting reduction in pest population.

Reduce clutter in your home and yard, which provides places for pests to breed. Cover trash cans and recycle bins to prevent pests from hiding inside. Caulk cracks and crevices where pests enter your house and use metal mesh to cover vents and pipes. Avoid overusing pesticides, which can create resistance. Use baits rather than sprays where possible.

Prevention

A pest control program should be based on the principles of integrated pest management (IPM). This approach focuses on preventive rather than reactive measures. The goal is to maintain or improve yields and quality while reducing risks to people, property, and the environment. The IPM process includes monitoring, identifying and assessing pests, and selecting appropriate management actions. These strategies are based on knowledge of the life cycle and behavior of the pest, its damage potential, and environmental factors.

Preventive measures are aimed at blocking pests from accessing food, water and shelter. These include keeping living areas clean and removing clutter; sealing cracks, holes, and gaps; installing screens and drainpipe covers; and clearing overgrown vegetation around homes and other buildings. It is also important to provide a good environment for beneficial organisms, such as birds, insects and earthworms, that help keep unwanted pest populations at bay.

When it comes to agriculture, IPM strategies include observing field conditions and scouting for pest activity to determine whether action is needed. This information is used to determine the best course of action, such as adjusting fertilizer application rates or planting dates to minimize problems with specific pests. It is also helpful in determining the need for and timing of pesticide applications.

Natural enemies, such as predators and parasites, can also be helpful in controlling pests. These can be introduced to an area through crop rotation, interplanting, and a variety of other practices. Managing weeds and using proper cultivation practices also can reduce the need for chemical controls.

When a pest population gets too high, the decision is made to take action. This may be triggered by esthetic or health considerations, or it may be the result of an economic loss. The objective is to reduce the number of pests to a level at which their harm is unacceptable, without disrupting ecosystems. In many situations, this is achieved through the use of suppressants, such as baits and traps, primarily in conjunction with nonchemical methods. In other cases, chemical controls must be used. It is essential to use chemicals sparingly and carefully so they do not negatively affect other organisms.

Treatment

Pests can damage the environment and cause harm to plants, animals, buildings and people. Pest control is the practice of eliminating or minimizing the number of pests to a safe level. It is a multi-step process that involves identifying the pest, altering environmental factors and using chemicals to kill or repel the pests. Preventing pests from entering the environment in the first place is a great way to reduce pesticide use. Sealing cracks or caulking windows will prevent many pests from ever entering the home.

Chemicals are often the fastest way to control a pest problem, but they can also be the most dangerous and least effective. It is important to carefully select the proper pesticide for the job, and to follow all of the directions on the label. Pesticides are formulated to destroy or repel specific pests, but they can also affect non-target organisms. This is called off-target effects. Using the least toxic pesticides will reduce the chance of off-target effects.

Other ways to control pests include changing habitats, modifying cultural practices and using resistant varieties of crops, wood, or animals. Some predators, parasites, and pathogens will naturally reduce pest populations. There is a time lag between an increase in the number of these natural enemies and a reduction in pest numbers.

Another method of controlling pests is by reducing their food supply. Keeping garbage cans tightly closed, regularly removing trash and storing food in sealed containers will help keep pests away. Changing watering patterns and fixing leaky pipes will decrease the availability of moisture to pests.

Some pests are repelled by certain scents, including the odor of citrus trees and roses. Other repellents are available as commercial sprays, candles and plug-ins. The best repellents are based on a combination of smell, taste and toxicity to the pest.

If a severe infestation is present, more drastic measures such as fumigation may be necessary. This involves pumping the room or building with a gas that will kill the pests. It is one of the most extreme methods of pest control and should only be used when other controls have been unsuccessful.