Your foundation is what your house stands on, so problems here can be serious. If you see cracks in the walls or doors and windows that don’t close, call for professional help immediately. Contact Pros Foundation Repair Greensboro NC now!
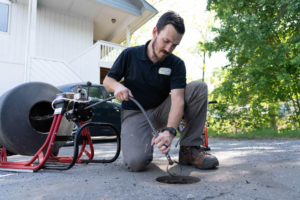
Steel piers are considered the most effective long-term solution for stabilizing a foundation. This method involves driving galvanized steel piers deep into the ground until they reach bedrock or sufficiently dense soil for stability.
Regardless of the method chosen, foundation repair experts will prepare the area under and around the house. This involves cleaning out the basement, rearranging household items, and, in some cases, digging tunnels or holes beneath the home to install piers or pilings. It also involves addressing water problems, whether by improving drainage or by adding waterproofing to the home’s basement.
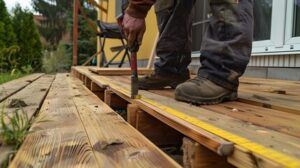
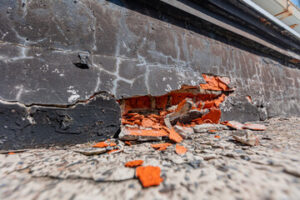
Before beginning work, contractors will evaluate the structural damage to the home and determine the best course of action. This may include assessing cracks in walls, which are often the first sign of foundation issues and should not be ignored. Wall cracks, especially if they develop in a zigzag pattern, can indicate shifting in the foundation. Floors that are sloping or uneven can also be a sign of foundation movement. Similarly, doors and windows that suddenly become difficult to open or close can be caused by shifting foundations that have sunk the frames.
The most common type of foundation repairs is installing concrete piers, or pilings. These are tall, cylindrical supports that resemble the columns on a plantation-style home’s front porch but are installed underground to support the foundation. These supports are installed by digging deep holes and then filling them with liquid concrete for piers or by driving pre-formed concrete pieces into the ground under hydraulic pressure for pilings. The piers or pilings then lift and stabilize the sunken areas of the foundation to return it to its original elevation.
Another option is steel piers, which are attached to hydraulic jacks that are inserted into stable soil underneath the foundation. This technique is used to fill voids that can be caused by soil shrinkage, frost action, and/or tree roots growing into the foundation. These piers can also be used to support the foundation in areas where the foundation has been moved upward, which is known as “foundation heaving.” In some cases, contractors may recommend specific soil stabilization methods that can help to reinforce the earth beneath the foundation for increased stability and durability. When these methods are applied correctly, they can keep the foundation in its correct level position for a long time.
Installation
If the foundation of your home is in trouble, you need to have it inspected by professionals right away. Ignoring a weak foundation will only make it worse and can lead to expensive and dangerous consequences. There are many different methods for fixing home foundation problems, but most involve driving long, slender metal beams deep into the ground to help support the structure above it.
Other popular repair techniques include using hydraulic jacks to lift and stabilize your foundation, filling voids with a high-density polyurethane foam, or shimming girder beams. Foundation contractors may also recommend installing a drainage system and adding ventilation to prevent moisture problems that can cause further damage to your home’s foundation.
Foundation damage is often noticeable in the form of wall cracks, but it can also show up as a sagging ceiling, sloping floors, or doors and windows that are difficult to open or close. These issues can be caused by a number of factors, including soil settlement and excessive moisture, but they’re almost always a sign that your foundation needs to be repaired.
Wall Cracks
When hairline cracks start to appear in your foundation walls, you need to take action immediately. These cracks typically run horizontally and have a zigzag pattern, and can be the first sign of serious foundation problems.
Gaps in the Ceiling
If your ceilings are sagging or pulling away from the walls, you should have them inspected by a professional immediately. If the gaps are large enough, you may need to install a truss system to keep the ceiling in place.
Shims for Sagging Beams
If sagging beams are in danger of falling out of the wall, they should be shimmed or replaced immediately. Shims add stability to weakened beams, and are a cost-effective solution for homeowners that need a quick fix.
If you need a longer-lasting solution, your contractor might recommend steel piers. These piers are driven underneath your foundation, and then attached to hydraulic jacks that can be used to lift and stabilize the structure. They can also be used to fill voids beneath your home, and are a more permanent option than slab-on-grade repairs.
Cleanup
Foundation repair is a meticulous process to restore the strength and stability of the foundation that supports your home, building or other structure. It addresses a wide range of causes, from the natural aging of the foundation to damage caused by weather events or other external influences. Understanding the different repair methods and how they work empowers property owners to take proactive measures that protect their investments.
The first step in the repair process is an inspection by a professional. They’ll explain what caused the problems and recommend the best course of action. Then, they’ll provide you with an estimate and a timeline for the repair process.
Once the repairs begin, you may need to clear a path for technicians and move furniture or wall decor away from the areas being worked on. In addition, if you have outdoor plants that are hard to relocate or too large for the space, you’ll need to cover them with tarps. Depending on the repair method, you may also need to drain or disconnect any underground utilities.
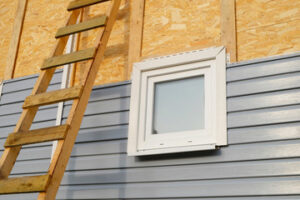
If you notice that doors and windows don’t line up as easily as they once did, or if there are gaps in the frames around them, this could be an indication of shifting in the foundation. Cracking walls and floors are also serious warning signs and should be addressed immediately.
In the repair process, professionals may install piers or anchors to lift and stabilize the foundation. They may also install steel shims or fill cracks with epoxy injections. When the job is done, they’ll refill the excavation area and compact the soils as necessary. They’ll then clean up the site so you won’t be left with a construction zone in your yard.
If you’re in need of foundation repair, choosing a contractor with experience, credentials and positive reviews is essential. When you choose Powerlift, our experts will clearly communicate timelines and expectations to minimize disruptions in your daily life. We’ll also keep the process as smooth as possible by implementing efficient, effective repair techniques that ensure lasting results.